
Installing Vintage Air’s SureFit A/C System in a 1987 Squarebody Truck
Modern air conditioning and heat might be one of the most valuable upgrades we can make to our classic rides. It seems like we can’t write a vehicle caption or car feature for the magazine without mentioning A/C, and it’s usually one of the first features referenced when someone is talking about their car or truck. Having cold air blasting in your classic during the summertime cruising months is something that greatly improves the driving experience and encourages you to enjoy your classic more often.
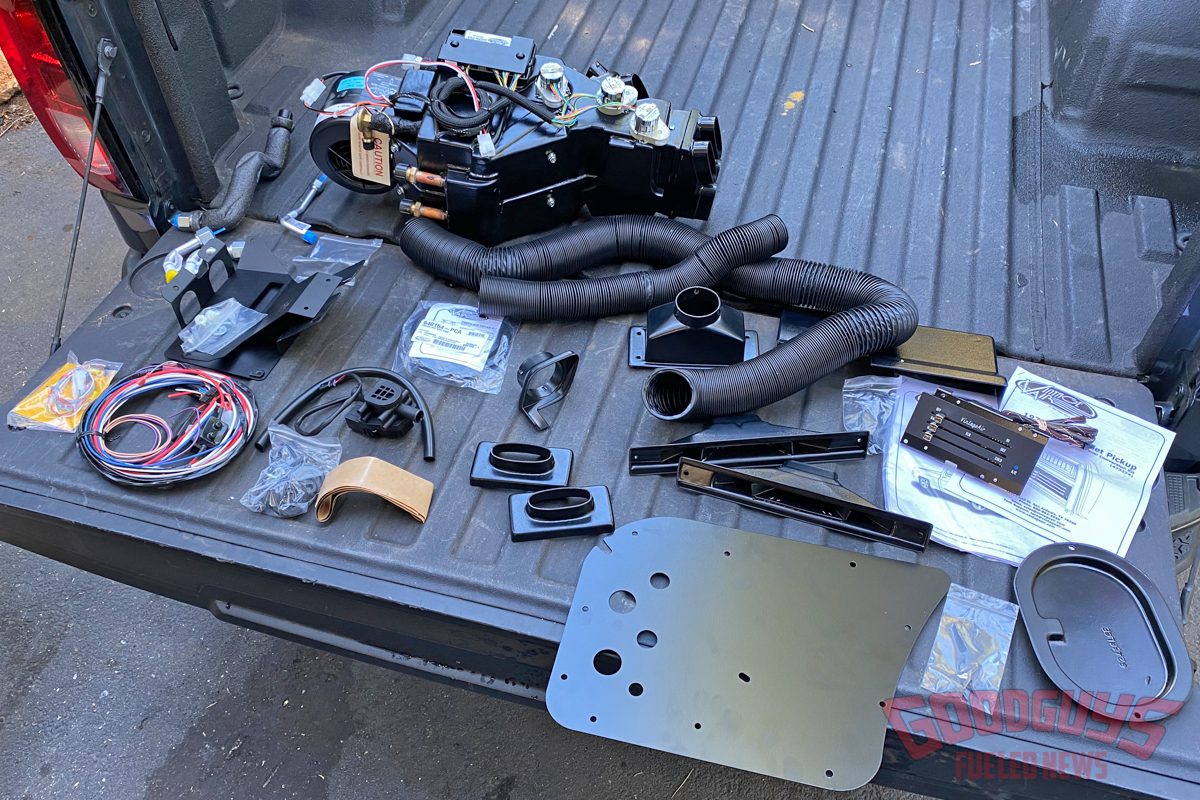
When you first unbox the Vintage Air SureFit kit it may seem a bit overwhelming. But take it one step at a time and you’ll be done before you know it.
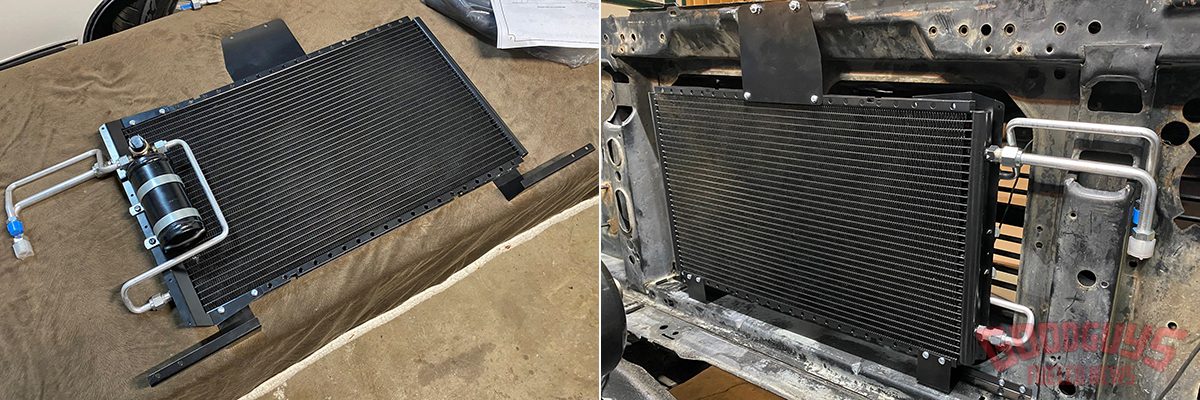
I started with assembling the condenser and drier kit. It was very straightforward with just a couple brackets, hard lines, nuts and bolts, and less than an hour of my time. An important thing to remember is to keep all lines and fittings capped throughout the installation process until the system is ready to be charged.
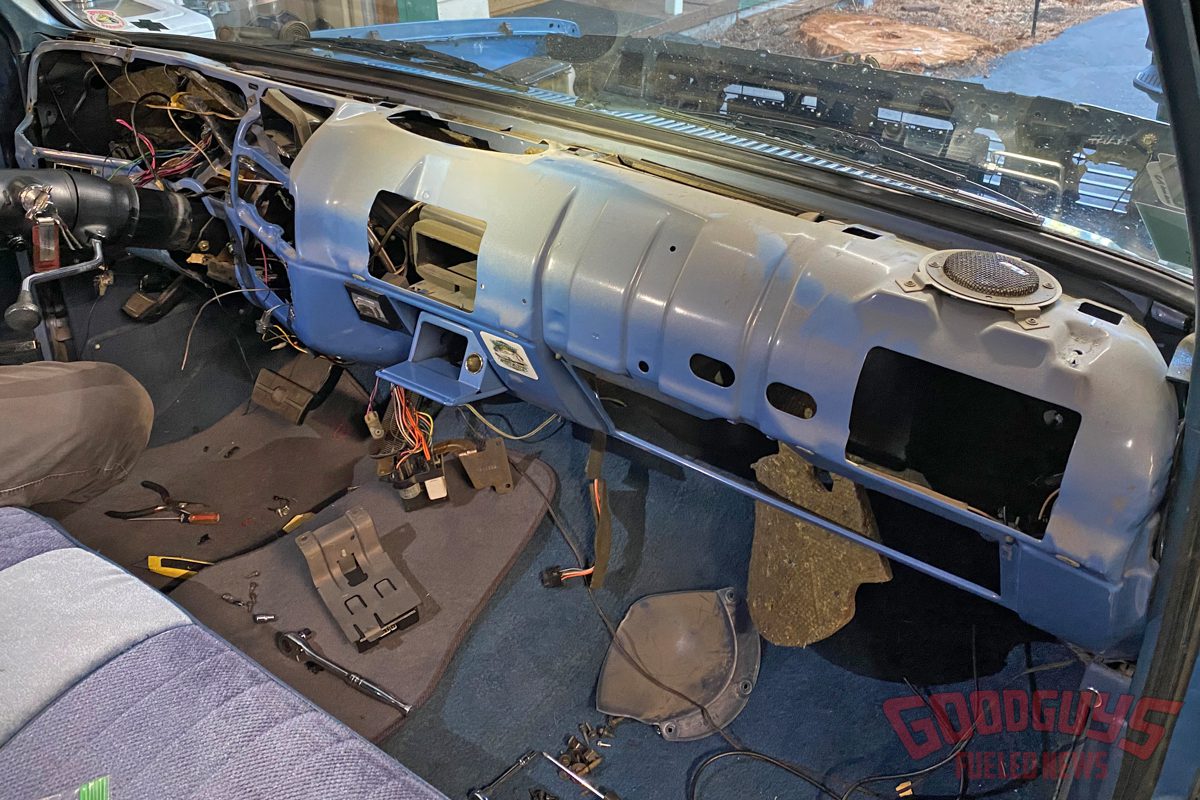
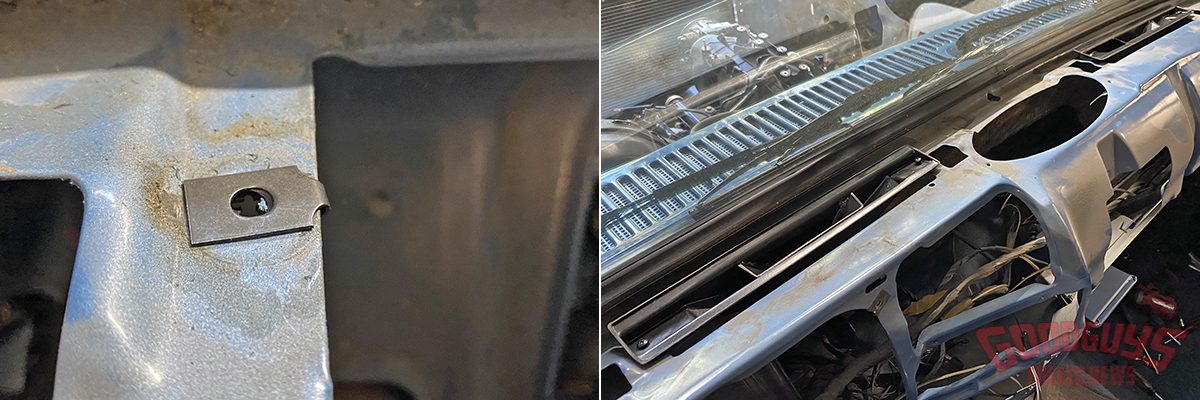
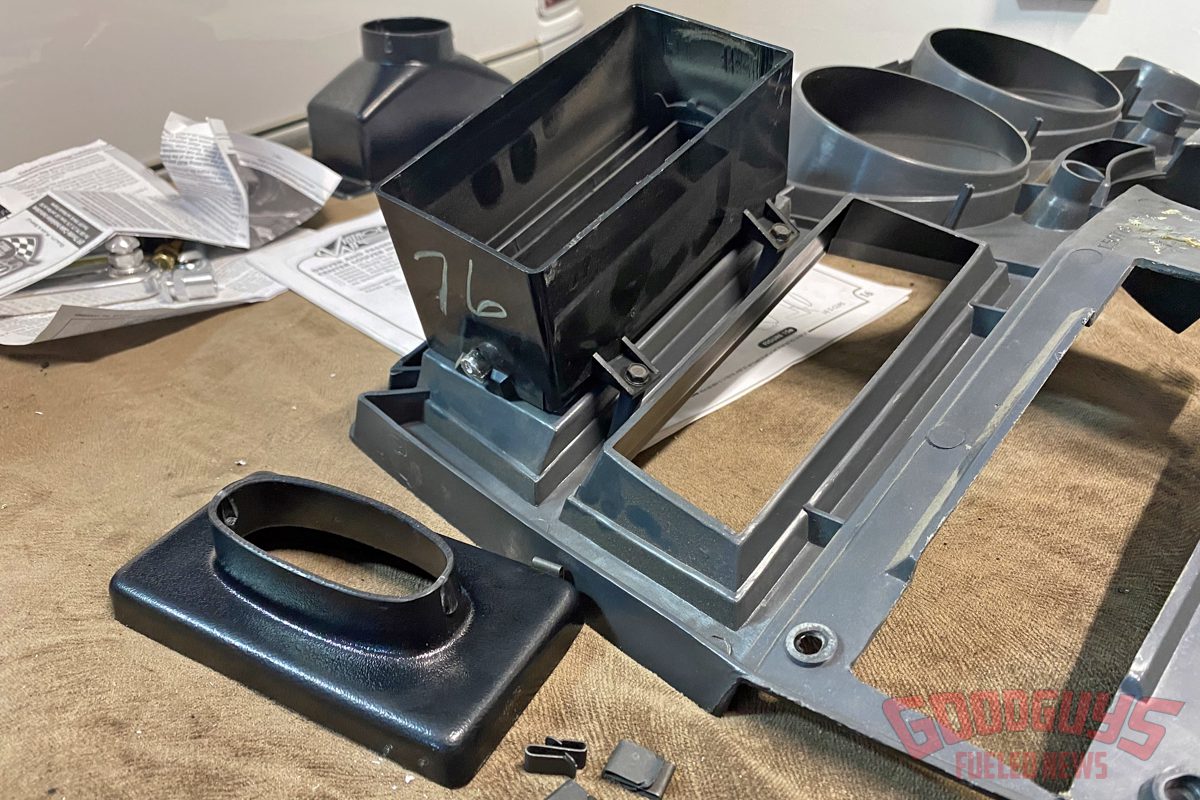
Next was removing the old factory A/C system. That included everything from the engine bay as well as the under-dash components. If you have a factory A/C truck, the only reused part will be the four vents in your dash and the driver’s side louver duct. The rest can be removed, including the defrost vents, which will be replaced by new ones from Vintage Air and held on with C-clips utilizing factory hole locations (shown below).
I recently had time to reflect on this when the factory air conditioning system in my ’87 GMC Suburban threw in the towel. It was time to repair or replace it, and since this was an old R12 system, repairing it would also involve converting it to R134. Considering the effort involved, I figured it made sense to replace the entire system with a more modern SureFit kit from Vintage Air.
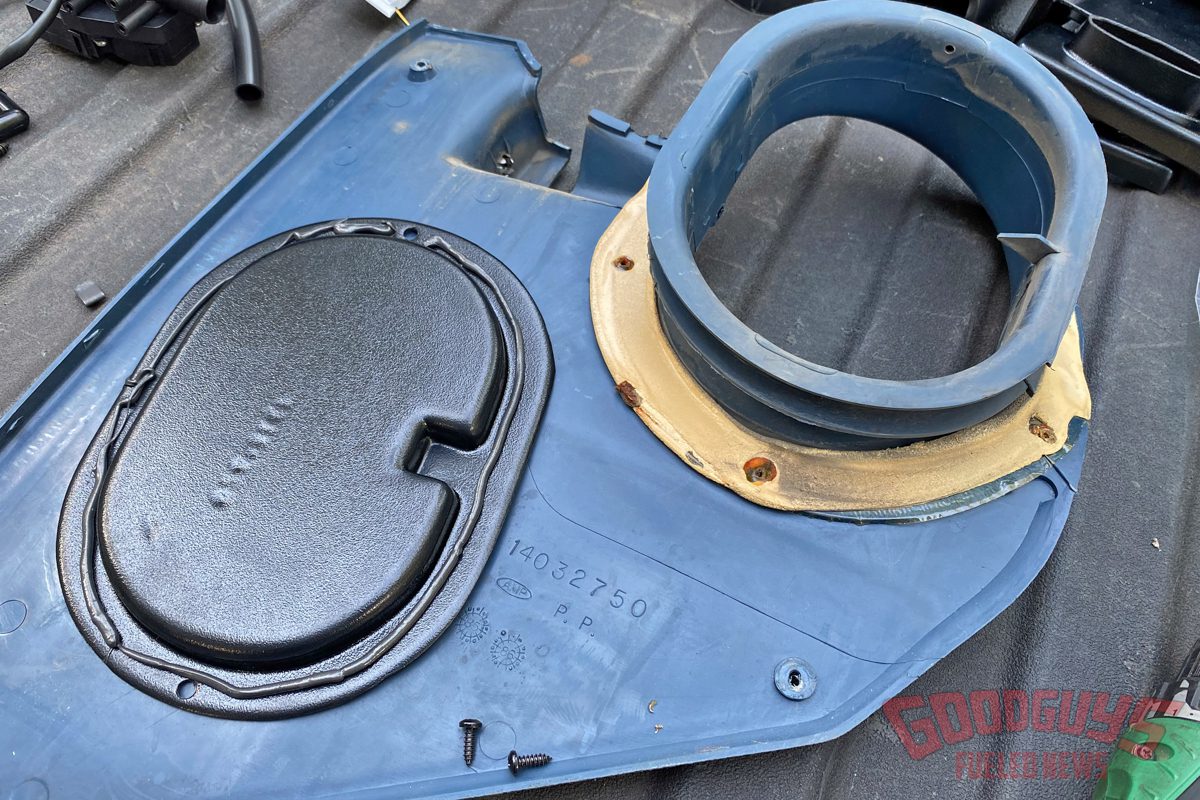
Vintage Air includes two block-off plates in the SureFit kit – one for the passenger side kick panel (shown) and another for the firewall inside the engine bay. The kick panel plate uses a seam of silicone (not included in the kit) and a couple screws to hold it in place.
When attaching the hard lines to the evaporator, beware that the evaporator is pressurized. It is okay to allow the pressure to release. Remember to lubricate the O-rings and keep the caps on the hard lines for now. Wrap the exposed metal with the supplied Press Tape.

One of the more difficult parts of the installation was assembling the included compressor bracket from Kwik Performance. I specifically needed this bracket for two reasons: 1) my engine is a 5.3 Vortec truck engine, and 2) I opted to run the factory accessory drive. If you get this kit you will need to purchase a tensioner for a 2002 Camaro Z28. The instructions from Kwik are not great, but this video on YouTube is helpful.
What’s nice about SureFit kits is they are vehicle specific. Vintage Air offers a TON of different vehicle-specific options for popular cars and trucks, and likely has one for your ride. They are complete bolt-in climate control systems that take the guesswork out of adding or upgrading A/C in classic and later-model muscle cars, restomods, and trucks. SureFit kits install easily, utilize most of the factory sheet metal, and are engineered as complete vehicle-specific systems.
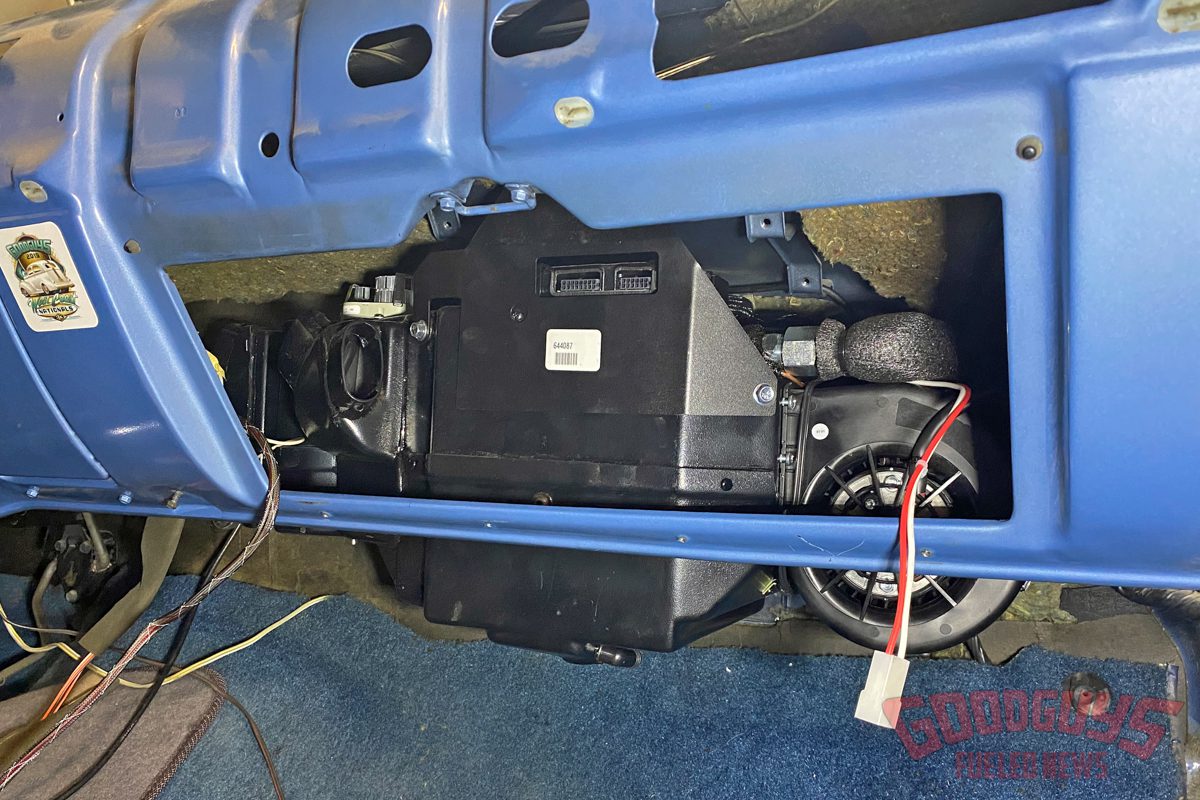
It’s a tight fit but the evaporator box will slide into place underneath the dash and secure with the supplied hardware. Ensure that the evaporator is level front to back and left to right before tightening all mounting hardware.
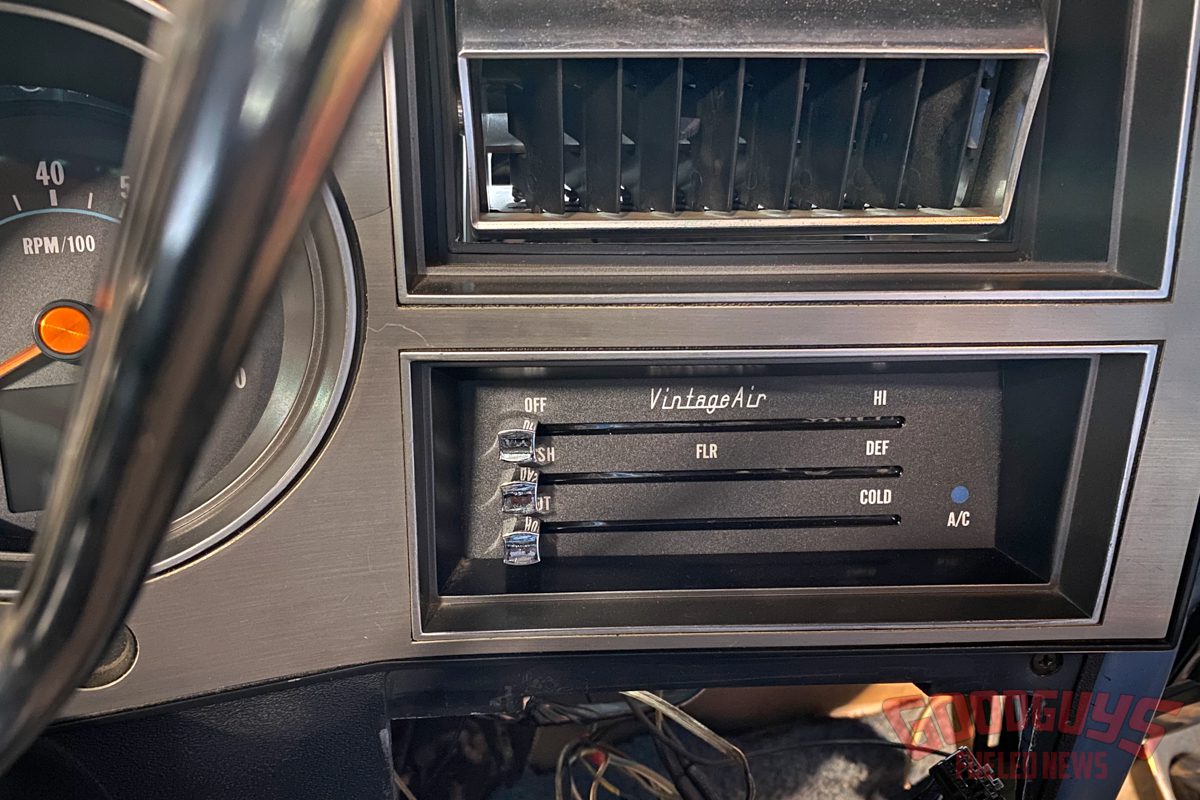
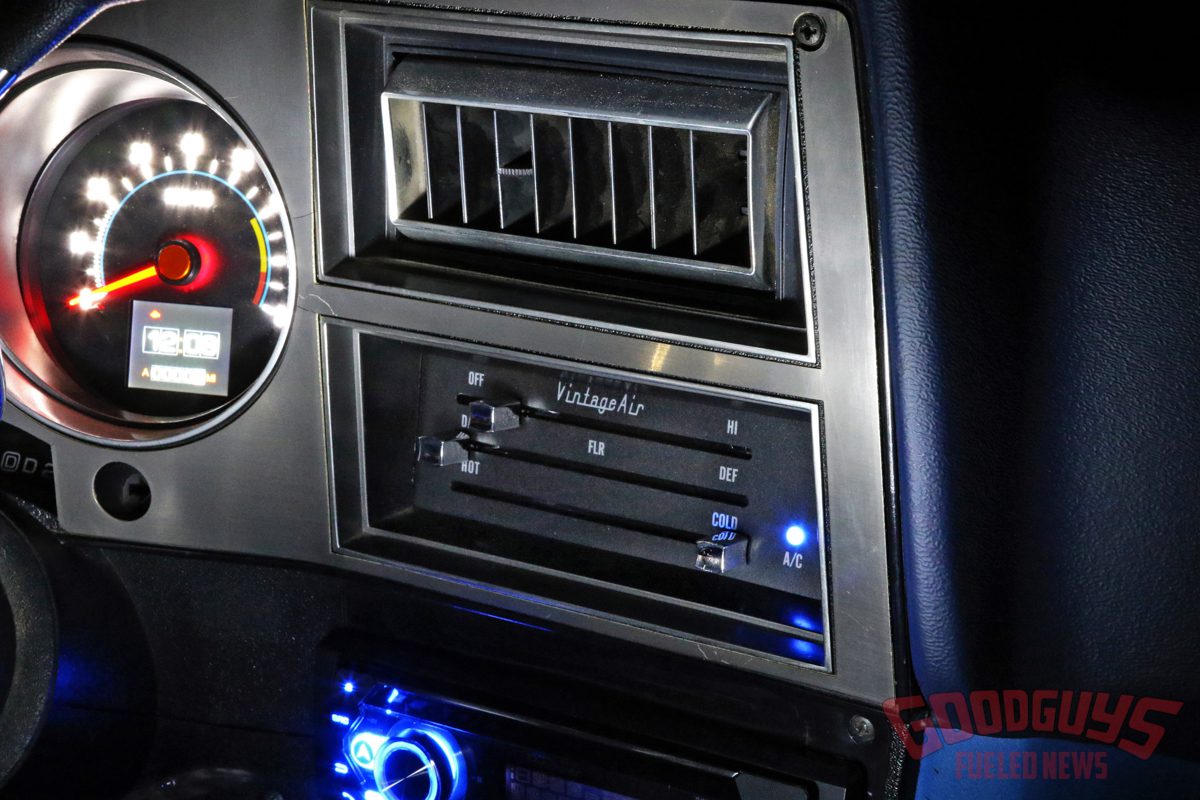
The new control panel will bolt in place of the factory unit and provides much smoother operation over the old mechanical levers.
While installing a new heat and A/C system can seem intimidating, I found the step-by-step directions to be laid out extremely well. They literally walk you through the entire process from start to finish. When it comes to electrical work and wiring, my comfort level is about a 3/10, but by just following the instructions I was able to get everything wired up and functioning properly, so I’m sure it’s within the skill set of most do-it-yourself enthusiasts. That said, it’s important to READ THE INSTRUCTIONS! This isn’t cheap furniture you can fumble your way through and eventually get it right.
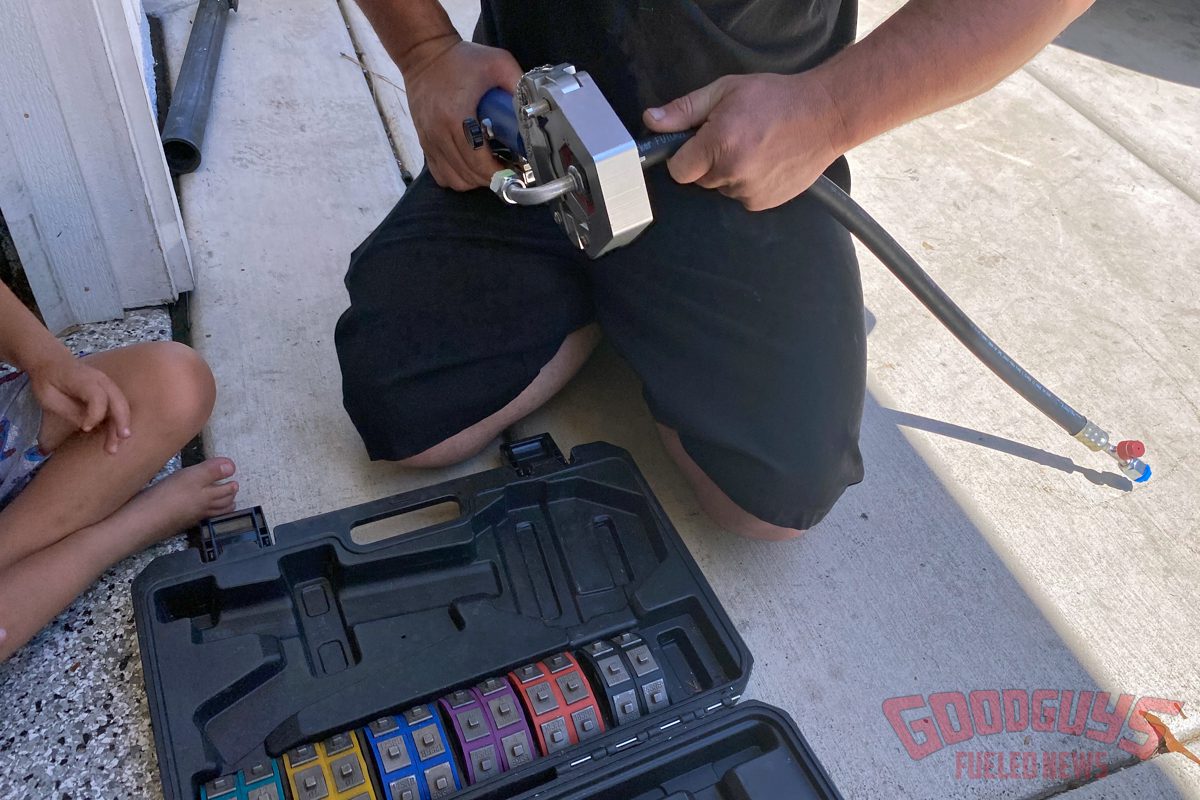
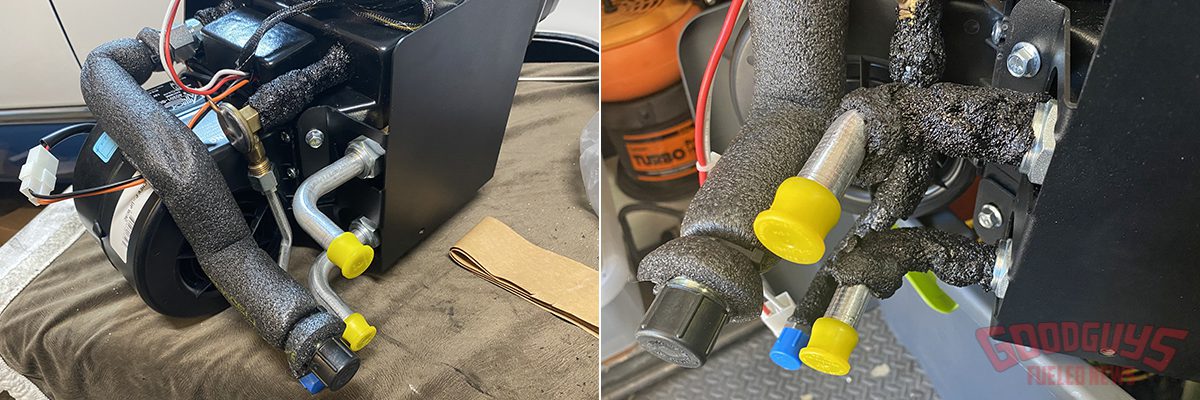
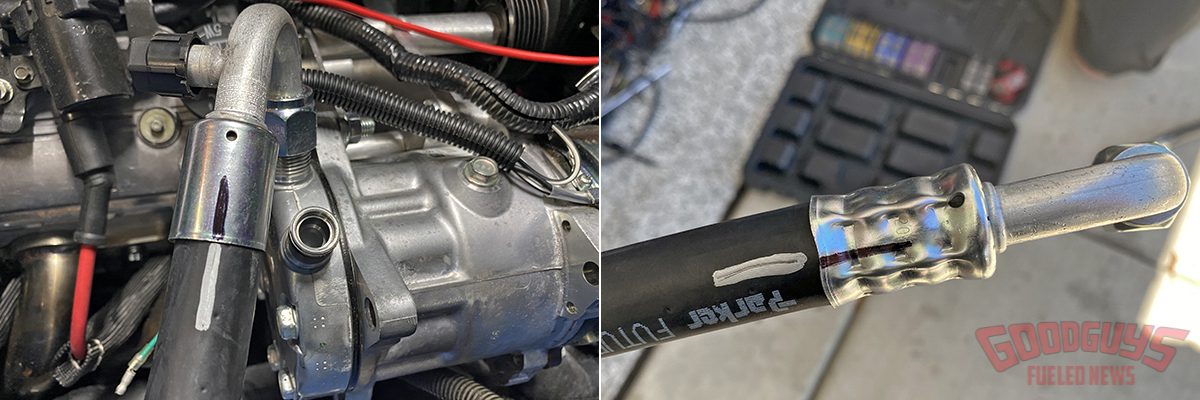
You will need to buy heater hose. This kit uses 5/8-inch ID hose. Start with threading the fittings hand tight onto the compressor and then mark the length of each hose. Then slide the hose into the fitting and make a mark on both the fitting and the hose that align with each other. You will need a beadlock hose crimping tool (or a friend that has one) to crimp the fitting onto the hose.
Again, it’s important to keep all fittings capped with plugs until ready to charge so moisture does not get into the drier and cause damage. But once you are ready to charge, attach all hoses to their corresponding fitting, and then use a professional to evacuate and charge the system. Proper charging with the correct amount of 134a refrigerant is critical for optimal system performance.
What you see here is the installation of a Vintage Air SureFit kit in an ’87 GMC Suburban that came with factory air (Vintage Air also offers kits for Squarebody trucks that didn’t come with factory air). It’s important to note that my Suburban is not a rear A/C truck; this kit was made for Squarebody pickups but worked in my Suburban since it is the same as a regular Squarebody pickup from the front seat forward. And as noted before, Vintage Air offers SureFit kits for a wide variety of vehicles, and the installation process is likely to be similar for many applications.
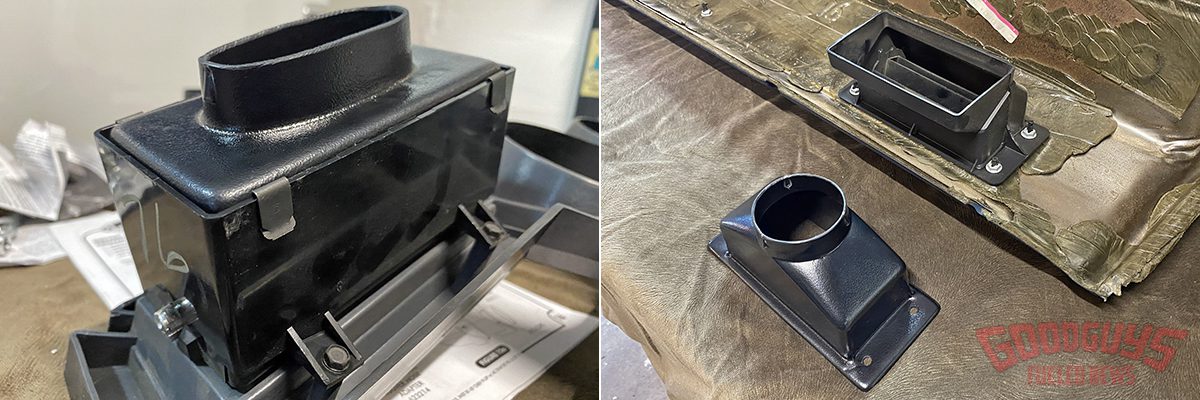
Vintage Air includes attachment pieces to make the factory vent housings work with the new system. A couple of the included S-clips and the new hose attachment piece slides into place. Note that you will replace (2) of the factory housings in the dash with new ones that are also included.
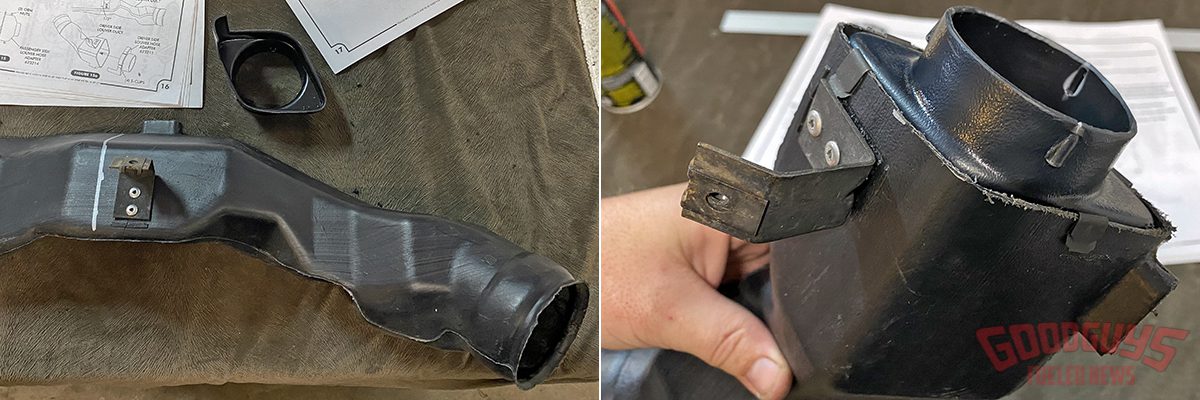
The factory driver’s side louver will need to be cut just to the left of the original mounting tab and fitted with this cap supplied in the SureFit kit held on with more S-clips.
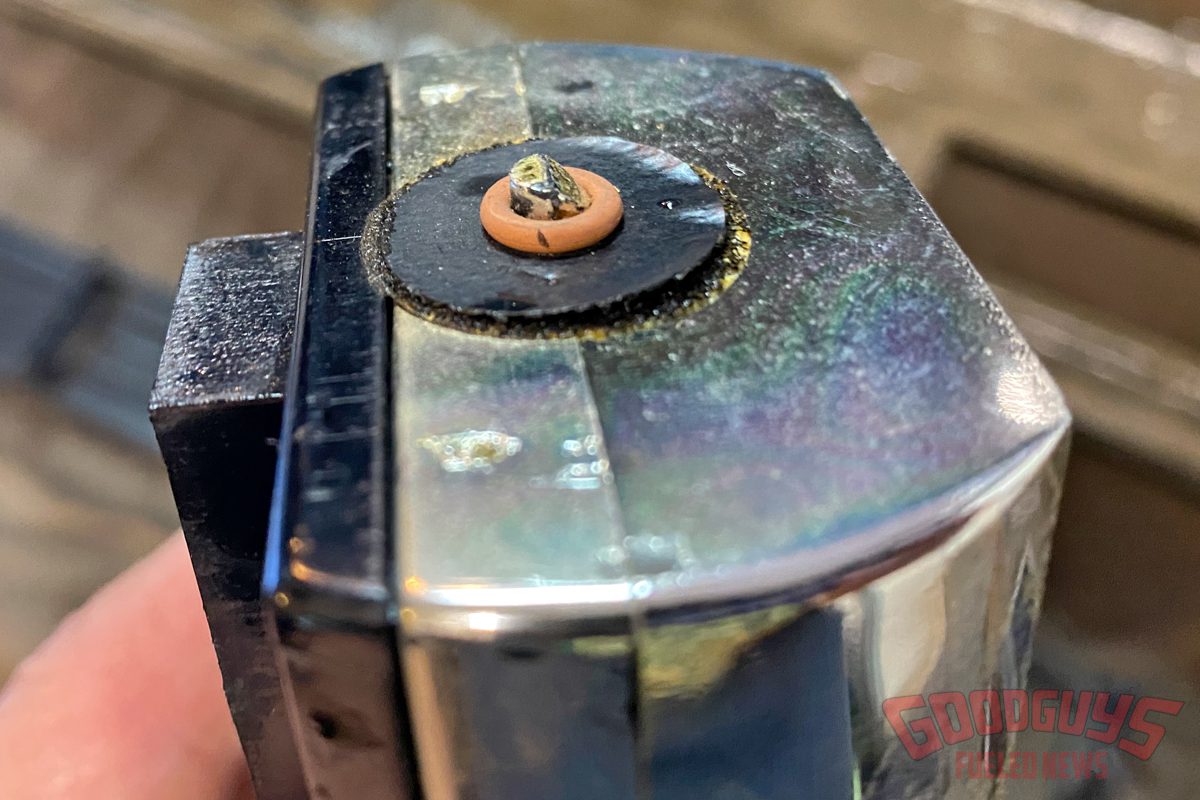
Bonus tip! Tired of stuffing paper into the bottom of your vents to keep them locked in position? A simple search on the internet led me to this handy tip. Just add an o-ring to one, or both, of the pegs on the side of the vent before re-installing them.
I had time on my side and installed the SureFit kit over the course of a week during nights and weekends, but I can see how an ambitious DIY’er could swap out their old A/C system to a SureFit kit as a weekend project. To see if there’s a SureFit kit for your ride, visit VintageAir.com.
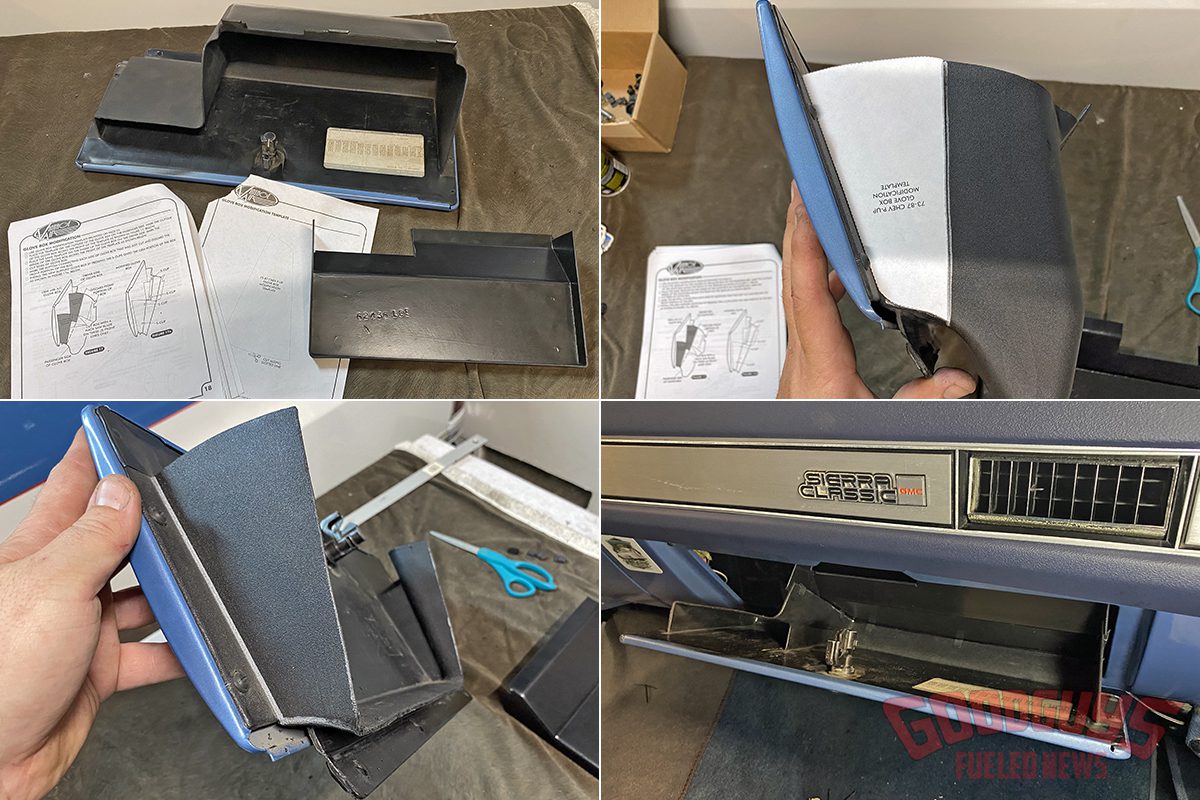
The glovebox will also need to be modified. Vintage Air provides a template on where to make cuts. The template will go on the outside on the passenger side of the glovebox, and on the inside when marking the driver’s side of the box since it has an offset step. The last thing is to cut the bottom of the glovebox connecting the two side cuts and attach the new filler with some more of those handy S-clips.

Running the six hoses from the box to the vents was a sign we were nearing completion. It wasn’t mentioned in the directions, but I added a zip tie to each hose on each end for an added measure that they won’t pop off down the road.
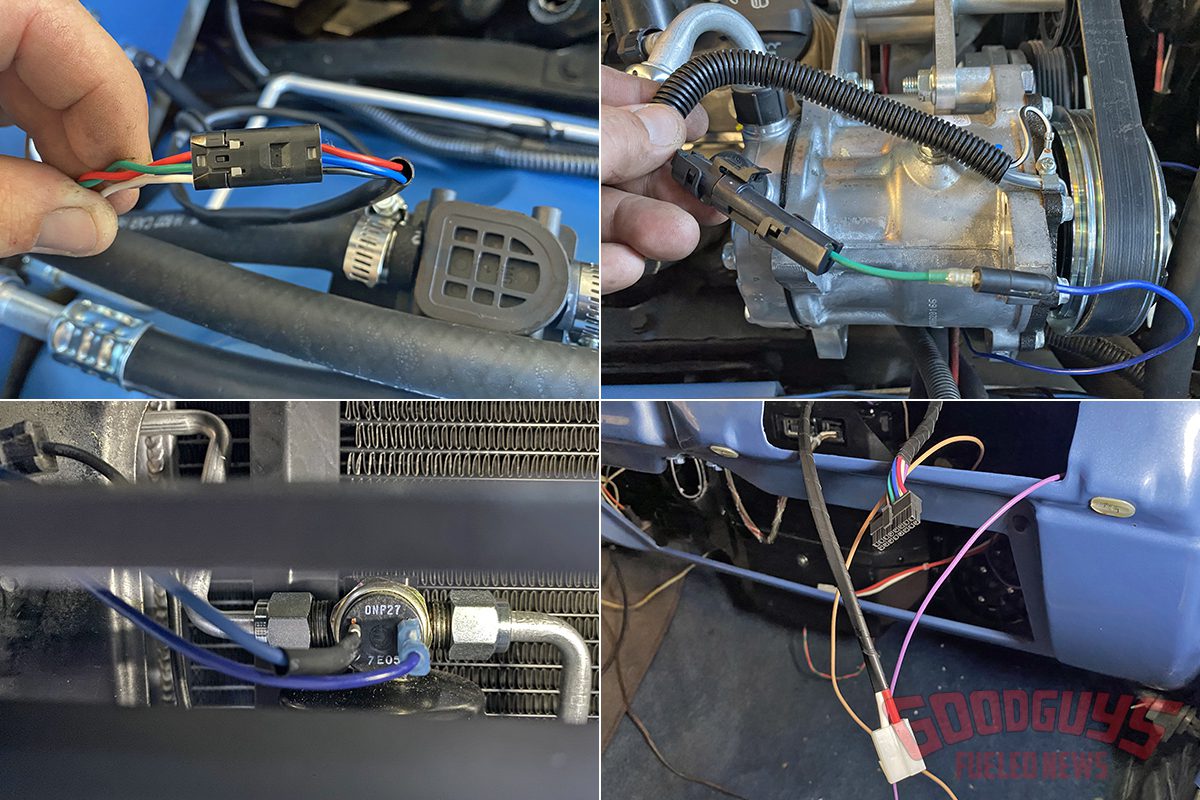
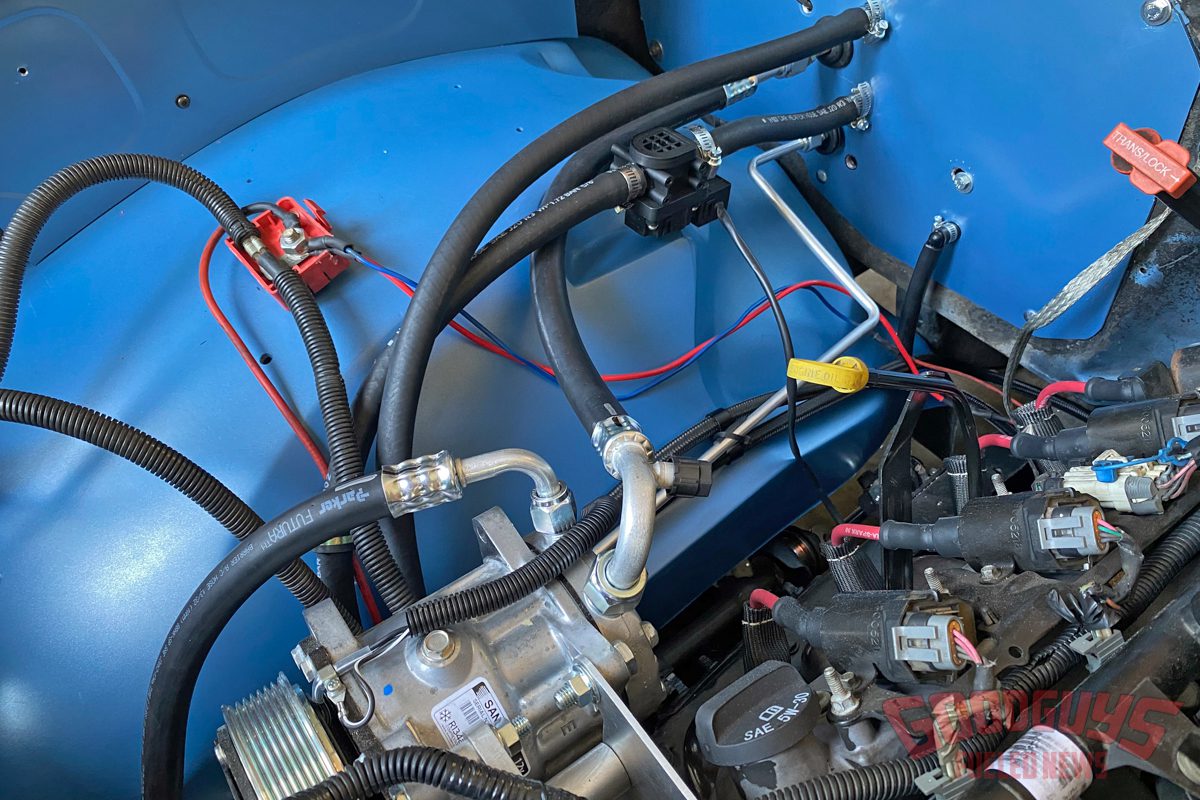
Last up was wiring, my least-comfortable task. But I laid everything out, READ THE INSTRUCTIONS, and started making connections. Most connections were simple plug-ins. The only wires I had to ‘make’ were the main positive and negative leads that run to the battery, power through the ignition switch, and one wire from the binary switch to the compressor. My system used a binary safety switch since my engine uses an engine-driven fan; with an electric fan, it would use a trinary switch to provide engagement with a/c pressure.
Photos by Steven Bunker